If was a cold February morning as the two Airco DH-2's headed to the front.Lionel Berry and Thurstan Cathcart had drawn the Dawn patrol.
On the other side of the lines, Alexander Fleischer was taking Charl Topfer out on his first mission.
Lionel spots the germans and heads across No Man's Land.
The pair of British pilots recognize the blue Eindecker of Fleisher, the scourge of the sector, and decide to double team him.
Berry maneuvers to the right of Fleisher while Cathcart takes him head on. The rookie, Topfer, swings out wide to the left and Fleisher tests Cathcart's mettle and goes nose to nose with him. Topfer turns in and fires a blast, but misses.
Fleisher, with nerves of steel, unleashes a hail of fury that rips into Cathcart's fragile machine. Cathcart returns fire, but his gun jams, curs the luck! (In game terms, Fleischer scored two hits with 6's and rolled a critical hit. The hit he scored was serious structural damage. This left Cathcart's plane with only one damage point left!)
Note: the red peg denotes Cathcart's jammed machine gun, while the white peg shows the remaining damage point.
While Cathcart feverishly tries to clear his jammed gun, Topfer swings in behind him. Meanwhile, Fleisher sets his sights on Berry's DH-2.
Cathcart's damaged bird is no match for the rookies twin Spandaus, and with a burst,Topfer sends Cathcart plummeting to earth.
In a daring maneuver, Berry evades Fleischer's attack and falls in behind Topfer. (in game terms, Berry won the initiave, making the germans move first. Fleisher flew past the cagey Brit and Topfer made a clumsy turn, leaving an opening for Berry)

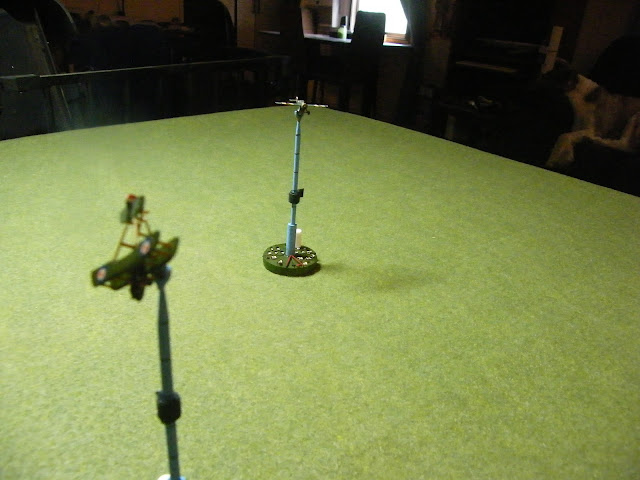
The witty Fleicher, Pulls a Split-S to get quickly back into the fight. (The lines in the flight stand represent the 5 altitudes used in Archibald. The middle band is at combat altitude,approximately the same altitude as everyone else. The split-S maneuver ends with the plane facing the opposite direction, one altitude band lower. That is marked by the velcro wrapper. Fleicher will have to climb back up to combat altitude to engage Berry)
Berry pours in a heaping helping of hot lead revenge and Topfer's plane spirals to the earth like a flaming comet! (Berry scored a critical hit and rolled another 6- the "Down In Flames!" result.) [sorry for the blurry photo, the recon plane took a near burst of Archie.]
Berry, running low on ammo, tried to widen the space between him and Fleisher. (I was rolling lots of 6's and 1's. 6's can result in critical hits while 1's use up ammo. With the score at tied 1 all and half his ammo gone, Berry wanted to leave Fleisher for another day.)
Seeing Berry heading back to his lines, Fleischer takes a desperation, long range shot and plants a bullet into Berry's heart sending another British flyer to his grave. (Fleischer scores two hits with sixes on that last shot. He converted the critical hit roll which resulted in Berry's demise. Note, I forgot to move Fleischer's altitude marker back up before I snapped this last photo.)
Archibald, Certainly Not! is another great game from 4P Press. It is easy to learn, plays fast, and is full of the barnstorming thrills and chills of the period. As miniatures games go, Archibald doesn't need a lot of room. The above game was played on a small dining table (32" x 42"). That was still enough room for two or three turns of maneuvering before the bullets started flying.
I would suggest to those that would play the game that, in addition to printing the QRS on cardstock, you also print the two pages of maneuvers on cardstock as well.
As for the snazzey bases, I designed those specifically for Archibald, Certainly Not! If you have a 3D printer and would like a copy of the STL file, give 4P Press a holler and perhaps they can make it available. The pegs in the photos came from Milton Bradley's Battleship game. There is an STLfor the pegs, but the prints for those failed and I wasn't able to reprint them before the game.